Last Updated: June 26, 2026
This comprehensive guide is designed for aspiring video creators, bloggers, and content marketers who want to learn how to plan and produce their first video with confidence. Whether you’re building content for your WordPress site, enhancing your social media presence, or simply exploring video as a creative outlet, you’ll discover a step-by-step blueprint covering idea generation, scriptwriting, storyboarding, shot planning, gear preparation, and filming techniques that transform beginners into capable creators.

Ever caught yourself watching a viral TikTok or a slick YouTube tutorial and thinking, *”I could totally make something like that!”*? **You absolutely can!** But before you grab your phone and hit record in a panic, there’s a golden secret shared by every pro creator: **Great videos aren’t made by accident; they’re made by design.**
Think of your video like baking a masterpiece cake. Would you just throw flour, eggs, and chocolate chips into a bowl hoping for magic? No! You need a recipe. In the world of video, your **Script** is the written recipe, and your **Storyboard** is the visual sketch of the final dessert. Together, they transform chaos into a cinematic experience.
Let’s roll up our sleeves and dive into the six-step creative journey to bring your idea to life!
🚀 Step 1: Spark Your Big Idea and Define Your Video Concept
Every blockbuster starts with a single spark. What’s the one thing you want to show or tell?
* Is it a hilarious skit about a clumsy pet?
* A “how-to” on making slime that defies physics?
* A glowing review of the latest video game?
**Pro Tip:** Keep it simple! For your debut, focus on **one** main thread. Instead of “Everything about Dogs,” try *”How to Teach Your Dog to Sit in 3 Easy Steps.”* Clarity is king.
**Your Mission:** Write your “Big Idea” in one punchy sentence.
*Example:* “My video will show viewers how to fold a paper airplane that actually flies far.”
According to a 2023 Wyzowl study, 91% of businesses now use video as a marketing tool, and viewers retain 95% of a message when watching it in video form compared to just 10% when reading text—making video creation one of the most impactful skills you can develop today.

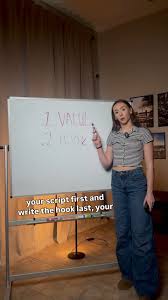
📝 Step 2: Craft Your Script—The Voice and Foundation of Your Video
Your script is the heartbeat of your video—the words that will be spoken. Don’t worry about sounding like Shakespeare; sound like **yourself**. Imagine you’re chatting with a best friend over coffee. Keep sentences short, words simple, and energy high!
The Setup: Establishing Your Script’s Framework
- Title: Give it a catchy name (e.g., *”Fly High: The Ultimate Paper Airplane Guide”*).
- Characters: Who’s on set? Just you? A buddy? List their names.
- Scene: Where are we? The kitchen table? The backyard?
The Two-Column Magic: Organizing Visuals and Audio
Grab a piece of paper and draw two columns. This is your creative playground!
* Left Column (Visual): What does the viewer **SEE**? (Action, props, camera angles).
* Right Column (Audio): What does the viewer **HEAR**? (Dialogue, narration, sound effects).
| Visual (See) | Audio (Hear) |
| *Close-up of hands holding a crisp piece of paper.* | “Today, I’m going to show you how to make the best paper airplane ever.” |
| *Hands fold the paper in half lengthwise.* | “First, fold your paper in half, like this!” |
Keep it Tight: Aim for **200–250 words** for a 2-minute video. Read it aloud! If you stumble, rewrite it. Remember, you don’t need to memorize it—cue cards or a phone screen are your best friends.

🎨 Step 3: Draw the Storyboard—Your Visual Blueprint for Every Shot
Now, let’s turn words into pictures. A storyboard is essentially a **comic strip for your video**. It maps out exactly what the camera sees in every shot. And guess what? **You don’t need to be an artist!** Stick figures are totally acceptable; the goal is planning, not perfection.
How to Sketch Your Way to Success
- Get Your Canvas: Use blank paper or download a free storyboard template. Draw boxes; each box equals one “shot.”
- Sketch the Action: In each box, draw the main thing happening. For our paper plane video, Box 1 shows the paper on the table; Box 2 shows the folding hands.
- Add Creative Notes: Write tiny captions underneath: *”Close-up,” “Smile,” “Zoom out.”*
- Number It: Keep the sequence logical so nothing gets lost in translation.
This step is your safety net. It reveals missing steps before you waste time filming them!
📹 Step 4: Plan Your Camera Shots and Angles Like a Director
With your storyboard ready, let’s talk camera angles. You have three main tools in your director’s kit:
* Wide Shot: Shows the whole room. Perfect for setting the scene or introductions.
* Medium Shot: From the waist up. Great for talking heads and explanations.
* Close-Up: Tight on a face or object. Essential for details, like showing exactly how a fold works.
New Creator Rule: Stick to **Medium Shots** and **Close-Ups**. They are easier to frame and keep the viewer’s attention glued to the action.
🎒 Step 5: Gather Your Supplies and Gear Before Filming
Before you hit record, do a “pre-flight check.” Lay out everything you need.
* For the Paper Plane: Paper, a flat table, maybe a fan for testing.
* For the Script: A prop like scissors or a marker? Get it ready now.
There is nothing more frustrating than pausing your filming flow to hunt for a missing screwdriver (or prop). Being prepared means smooth sailing!
🎬 Step 6: Practice Your Script and Film Your First Video
The big day has arrived!
- Rehearse: Read your script a few times to find the rhythm.
- Consult: Show your storyboard to a friend. Ask, *”Does this make sense?”*
- Roll Tape: Start filming!
Don’t fear mistakes! If you mess up, just hit record again. The best videos often have a few funny bloopers that make people laugh. Embrace the imperfection!

✨ Final Tips for a Successful Creative Launch
* Keep it Short: Aim for **1–3 minutes**. Short videos are punchy, fun, and easier to edit.
* Lighting is Life: Film near a window or outside. Natural light makes even a smartphone video look professional.
* Have Fun! If you are enjoying the process, your audience will feel it too.
Planning with a script and storyboard might feel like extra homework, but it’s actually your superpower. It saves you stress, saves you time, and guarantees your video turns out amazing. So, grab your phone, grab a pen, and unleash your imagination.
Lights. Camera. Action!** 🎥✨ You’re ready to create something truly special.
Latest for youtube:
Frequently Asked Questions About Creating Your First Video
What is the difference between a script and a storyboard?
A script is the written document containing all dialogue, narration, and audio cues for your video—essentially what viewers will hear. A storyboard is a visual representation showing what viewers will see in each shot, typically drawn as a series of frames or boxes. Together, they provide a complete blueprint that covers both the audio and visual elements of your production.
How long should my first video script be?
For beginners, aim for 200–250 words for a 2-minute video, which is an ideal length to maintain viewer engagement. The general rule is approximately 125–150 words per minute of finished video. Starting with shorter content allows you to master the fundamentals before tackling longer, more complex projects.
Do I need artistic skills to create a storyboard?
Absolutely not—stick figures and basic shapes work perfectly fine for storyboarding. The purpose of a storyboard is planning and communication, not artistic perfection. Many professional filmmakers use simple sketches, and you can also find free storyboard templates online or use WordPress plugins that help organize your visual planning process.
What equipment do I need to film my first video?
You can create quality content with just a smartphone, natural lighting from a window, and a quiet space. As you grow, consider adding a tripod for stability, a basic microphone for better audio, and simple editing software. Many successful creators on WordPress-based video blogs started with nothing more than their phone and free SEO tools to optimize their content.
How can I make my videos look more professional on a budget?
Focus on three key areas: lighting, audio, and stability. Film near windows for free natural light, minimize background noise, and prop your phone against books if you don’t have a tripod. Clean, clutter-free backgrounds and consistent framing make a significant difference without costing anything.
Should I memorize my script or use cue cards?
Most creators use cue cards, teleprompter apps, or simply place their script near the camera lens. Memorizing can lead to stiff, unnatural delivery, while reading naturally from prompts keeps your energy authentic. Practice reading your script aloud several times before filming so the words feel conversational rather than rehearsed.
How do I optimize my video content for better visibility on WordPress?
Use descriptive titles, write detailed video descriptions, and include relevant tags when uploading to your WordPress site. Many creators leverage SEO tools and plugins specifically designed for WordPress to help their video content rank better in search results. Adding transcripts, custom thumbnails, and embedding videos properly also improves both accessibility and discoverability.
📅 Last updated: