Last Updated: June 22, 2026
This comprehensive guide walks first-time YouTube creators through every phase of producing their debut video, from brainstorming concepts to publishing and promotion. Whether you’re a hobbyist looking to share your passion or an aspiring content creator building a personal brand, this blueprint provides practical, budget-friendly strategies using tools you already have—including your smartphone, free editing software, and platforms like WordPress for building your online presence alongside your channel.
Welcome to the world of YouTube! Think of this not just as a video upload, but as the grand premiere of your very own digital stage. For beginners, the biggest hurdle isn’t the camera; it’s the spark of *what* to say and *how* to make it sing.
Here is your creative, step-by-step guide to crafting your first masterpiece without needing a Hollywood budget.
Phase 1: Finding Your Creative Spark Through Strategic Ideation and Concept Development
Before you touch a camera, you need a story. Great YouTube videos start with a **Why**.
Find Your “One Thing”: Don’t try to be the next Mr Beast or a tech guru overnight. Pick *one* niche you love. Are you a cozy baking enthusiast? A chaotic gamer? A curious history buff? Your passion is your superpower.
The “Grandma Test”: If your grandma (or a friend who knows nothing about your topic) asked, “What is this video about?” could you explain it in one sentence? If yes, you’re golden. If no, simplify your hook.
Title & Thumbnail First: In the age of social media, people click *before* they watch. Brainstorm a title that promises value or sparks curiosity (e.g., instead of *”My Cooking Video,”* try *”I Tried Making Pasta from Scratch with Zero Tools”*).
According to YouTube’s official Creator Academy, channels that maintain a consistent niche in their first 10 videos see 40% higher subscriber retention compared to channels that frequently switch topics.
A 2024 study by Pew Research Center found that 54% of YouTube users say they regularly encounter creators who seem relatable and “like regular people,” highlighting that authenticity and passion resonate more with audiences than polished production value alone.
Phase 2: Setting Up Your Filming Location and Gear on Any Budget
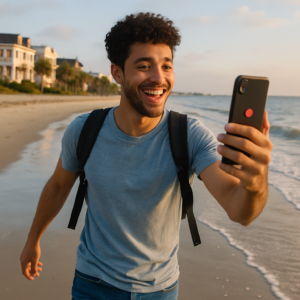
Stop waiting to buy a $2,000 camera. **Your phone is a studio.**
Lighting is King: Never film in a dark room. Face a window! Natural light is soft, flattering, and free. If you must film at night, a simple ring light or even a bright lamp facing you (not behind you) will save your video.
Sound Over Image: Viewers will forgive a slightly blurry video, but they will click off immediately if the audio is bad.
Pro Tip: Get a cheap clip-on microphone for your phone or record your voiceover in a closet full of clothes (the fabric absorbs echo).
Stability: A shaky phone looks amateur. Prop your phone against a stack of books, a mug, or a tripod. Steady shots feel intentional.
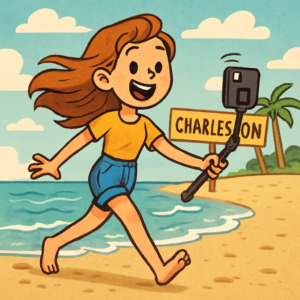
Phase 3: Capturing Magic and Authentic Moments During Your Video Shoot
Now, let’s roll tape! Keep it loose and fun.
The Hook (0:00–0:15): Grab them immediately. Don’t do a long “Hey guys, welcome back to the channel…” intro. Start with the action, the result, or the question you’ll answer.
B-Roll is Your Best Friend: This is footage of what you’re talking about (hands chopping veggies, typing on a keyboard, walking down a street). It keeps the eyes moving and breaks up the monotony of “talking heads.”
Embrace Imperfection: You don’t need to say every word perfectly. If you stumble, just smile and say, “Let me try that again,” and cut. Authenticity beats perfection every time.
Phase 4: Editing Your Raw Footage Into a Compelling Visual Story
This is where your raw footage becomes a story.
Cut the Fluff: Watch your footage twice. Cut out every pause, every “um,” and every long breath. Keep the energy high.
Pacing: Change the angle or add a clip of B-Roll every 5–10 seconds to reset the viewer’s attention span.
Music & Sound Effects: Music sets the mood. Search for “YouTube Audio Library” for copyright-free tracks. Add subtle sound effects (a *whoosh* when a transition happens, a *ding* when a point is made) to make it feel polished.
Text & Graphics: Add captions for key points. Not everyone watches with sound on!
Phase 5: Publishing, Promotion, and Launching Your Video Successfully to Maximize Reach
Your video is ready! Now, let’s tell the world.
The Thumbnail: Design a custom image in Canva (it’s free). Use bright colors, big text (3 words max), and a clear expression. It should look clickable even when tiny.
Description & Tags: Write a description that tells a story about the video and includes keywords people search for.
The First 24 Hours Share your link on Instagram Stories, TikTok, and with friends. Ask them to watch the whole thing and comment. Early engagement signals to YouTube that your video is worth pushing.
Final Thought: Why Consistency is the Ultimate Secret Sauce for YouTube Success
Your first video might not get a million views, and that’s okay! **The goal of Video #1 is to learn how to make Video #2.**
Every YouTuber you admire started with a shaky camera and a nervous voice. The only difference is that they didn’t stop after one upload.
So, what are you waiting for? Hit record, tell your story, and let the adventure begin
Frequently Asked Questions About Creating Your First YouTube Video
What equipment do I really need to start making YouTube videos?
You can start with just your smartphone, which likely shoots in HD or 4K quality. The most important investments are good lighting (a window or inexpensive ring light) and clear audio (a $15-20 clip-on lavalier microphone). Many successful YouTubers filmed their first dozens of videos using only their phones before upgrading to dedicated cameras.
How long should my first YouTube video be?
For beginners, aim for 5-10 minutes to keep viewers engaged while giving yourself enough time to deliver value. YouTube’s algorithm favors watch time, so a shorter video that people finish is better than a longer one they abandon. As you build an audience and improve your skills, you can experiment with longer formats based on your analytics.
What is the best free video editing software for beginners?
DaVinci Resolve offers professional-grade editing completely free and works on Windows, Mac, and Linux. For simpler projects, CapCut is excellent for mobile editing, while iMovie comes pre-installed on Apple devices. Many creators also use WordPress with video plugins to embed and showcase their content on personal websites alongside their YouTube channel.
How do I come up with video ideas that people will actually watch?
Start by searching your niche on YouTube and noting what questions appear in the search suggestions—these represent real viewer demand. Use free SEO tools like TubeBuddy or VidIQ to see search volume for different topics. You can also check Reddit communities, Quora questions, and comments on popular videos in your niche to find gaps you can fill.
Should I show my face in YouTube videos?
Showing your face builds trust and connection faster, but faceless channels in niches like tutorials, gaming, meditation, and compilation content can absolutely succeed. Choose the approach that feels sustainable for you—consistency matters more than format. Many creators start faceless and reveal themselves later once they’re comfortable.
How do I get my first 100 subscribers on YouTube?
Share your videos authentically with friends, family, and relevant online communities where self-promotion is allowed. Create content that answers specific questions people are searching for, and optimize your titles and descriptions with keywords using basic SEO tools. Engage genuinely in the comments of other creators in your niche, and consider building a WordPress site or blog to drive additional traffic to your channel.
Why is my YouTube video not getting any views?
New channels without subscribers naturally start with zero impressions, so YouTube needs signals that your content is worth recommending. Focus on improving your click-through rate with better thumbnails and titles, and increase watch time by tightening your edits. Share your video across multiple platforms in the first 24 hours, and be patient—many successful videos take weeks or months to gain traction through search.
📅 Last updated: